The store will not work correctly when cookies are disabled.
Your datas, Your choice
We attach great importanceto your satisfaction and conduct our cookie management policy with this constant concern. By accepting them, you allow our brand to better support you and grow alongside you.
Use of cookies:
To ensure the proper functioning of our website and to improve your purchase experience ;
To analyse our traffic and to optimize our website's performance ;
To suggest customised contents matching your interests
You can withdraw your consent at any time by clicking on the link accessible in our personal data protection policy. To learn more, click here.
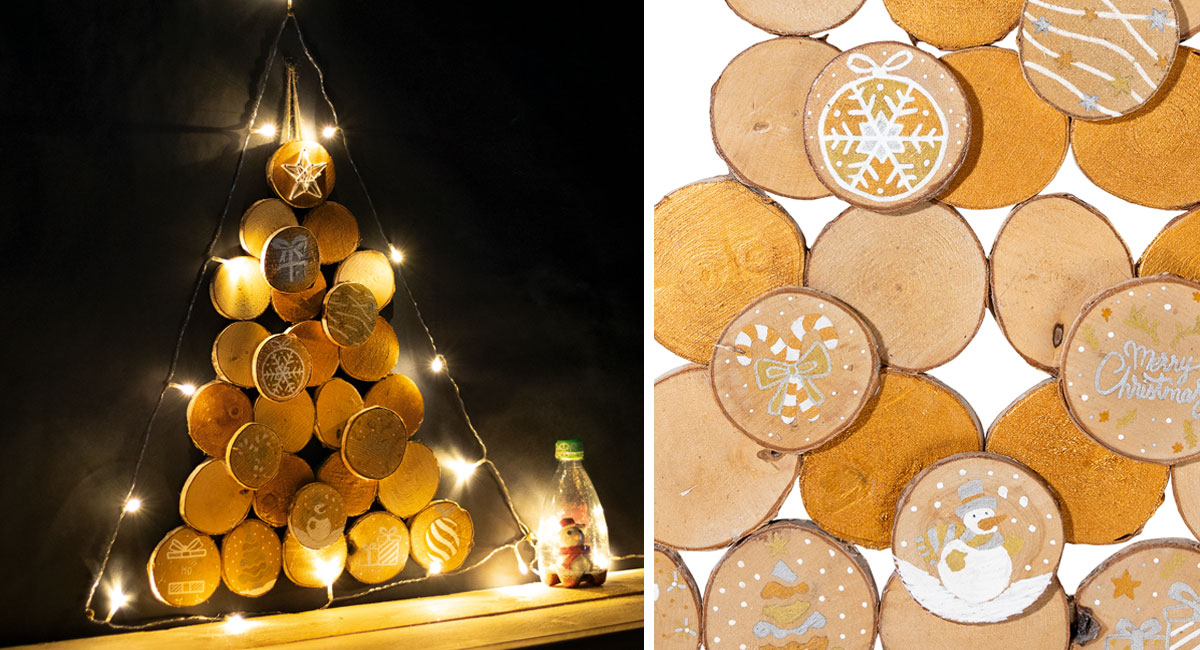
Once dry, make designs on the 10 wooden discs using Posca and Christmas mini stencils.
On a 11th disc, create a woven star with the pins in a STRING ART" way (step to be performed by an adult). The child can then thread the waxed cotton thread around the pins."
Once the drawings are dry, use a coat of varnish to finalize the pieces.
Position the fir-shaped pieces, spacing the blanks and those with drawings.
To give relief to the tree, keep a few discs to put them on top. Then, depending on the positioning, paint bronze rings to form a garland.
With the mini pistol, glue the first wooden rings from the bottom to the top onto a piece of cardboard.
Place two jute twine on the star washer to form a loop and glue it.
Optional step: cut the outline of the tree with a craft knife or decorate the cardboard around the tree.